Stretchy fabric has a mind of its own. You line everything up beautifully, press the foot pedal, and your neat seam comes out looking all rippled and stretched.
Lots of beginners steer clear of jersey and other knits because they’ve heard they’re tricky. The good news is that learning how to sew stretchy fabric doesn’t need fancy equipment. Your everyday sewing machine can do it, as long as you know a few little tricks.
In this post I’ll walk you through the needle and stitch that make the biggest difference. You’ll also find ways to stop your seams stretching out as you sew, and what to do when things still go a bit wonky.
The first project I sewed with knit fabric the seams snapped, they were wonky and just looked dreadful. I don’t think I knew about the right stitch, thread or needles to use.
Why stretchy fabric goes wonky
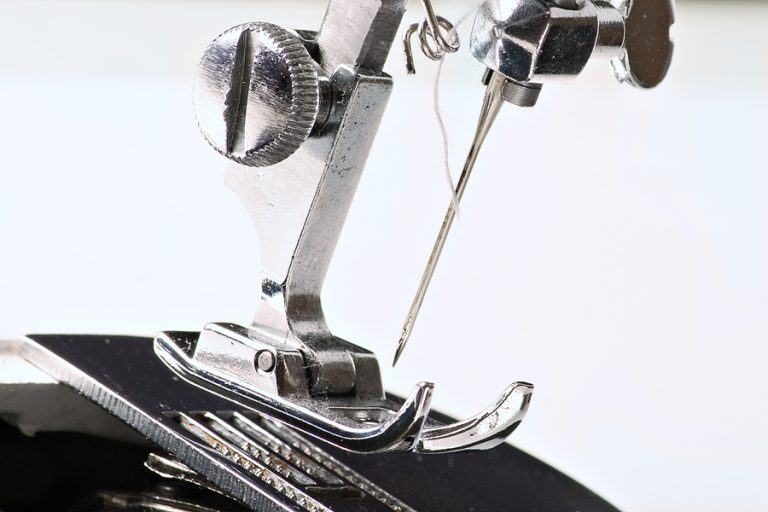
Stretchy fabric goes wonky because it moves while you sew. The presser foot pushes the top layer along, while the feed dogs (the little teeth under the fabric) pull the bottom layer. On a woven cotton that barely matters. On a knit, the two layers end up stretched by different amounts, and the seam ripples once you let go.
Pulling the fabric as you sew makes it worse. Even a gentle tug stretches the fibres, and they spring back after the stitches are in.
Every fix in this post comes back to one idea, which is letting the fabric travel through the machine without being stretched. You are really only guiding that fabric through the machine and keeping the seam allowance even. Once you know that, the rest starts to make sense.
If your seams have ever looked rippled, you’ve very likely done nothing wrong. Knits just behave this way until you know how to handle them.
What you need before you start
You don’t need an overlocker (also called a serger) to sew stretchy fabric though they are a fantastic addition to your sewing machine. A basic sewing machine will do the job with a few small tweaks.
Here’s what I’d put out on your table:
• A stretch or jersey (ballpoint) needle, in size 75/11 or 80/12
• Good quality all-purpose polyester thread
• Clips or fine pins
• Sharp scissors or a rotary cutter
• Scraps of your fabric for testing
• A walking foot, if you have one (handy but optional) I don’t use one personally.
The rounded tip on a ballpoint needle slides between the loops of a knit instead of piercing them. That helps with skipped stitches and little holes. Polyester thread has a touch more give than cotton, so it’s less likely to snap. Test this by gently tugging at the seams, if you hear any snapping or popping then you need to check the stitch, thread and or needle.
Please see this page for all my favourite shops and supplies.
If you only do one thing from this list, pop in a fresh stretch needle. It’s the cheapest fix in sewing and it solves more problems than you’d expect.
Prep your fabric before you cut
Wash and dry your fabric the way you’ll care for the finished item. Knits can shrink quite a bit, and it’s much nicer to find that out before you’ve made your top. Have some sort if system in place so that you know what fabrics you have a haven’t preached (I overcook the raw edges).
Lay the fabric flat on a table when you cut. Don’t let it hang over the edge, because the weight will drag it out of shape. Pattern weights and a rotary cutter are lovely for this, but sharp scissors work too.
Check the stretch direction on your pattern as well. Most knits stretch more across the width than down the length, and patterns are drawn to use that, two way vs four way stretch. The pattern will tell you which types of knits to use. For more information on grainline see this post
Taking five minutes here saves so much fiddling later. Pop the kettle on while it’s in the wash.
How to sew stretchy fabric on a regular sewing machine
A straight stitch has no give, so the thread snaps when the seam is stretched (think of pulling a T-shirt over your head). You need a stitch that can stretch along with the fabric.
Try these on a scrap first:
• Stretch stitch: many machines have a built-in one, often shown as a little lightning bolt. It’s strong and stretchy, but harder to unpick if you make a mistake.
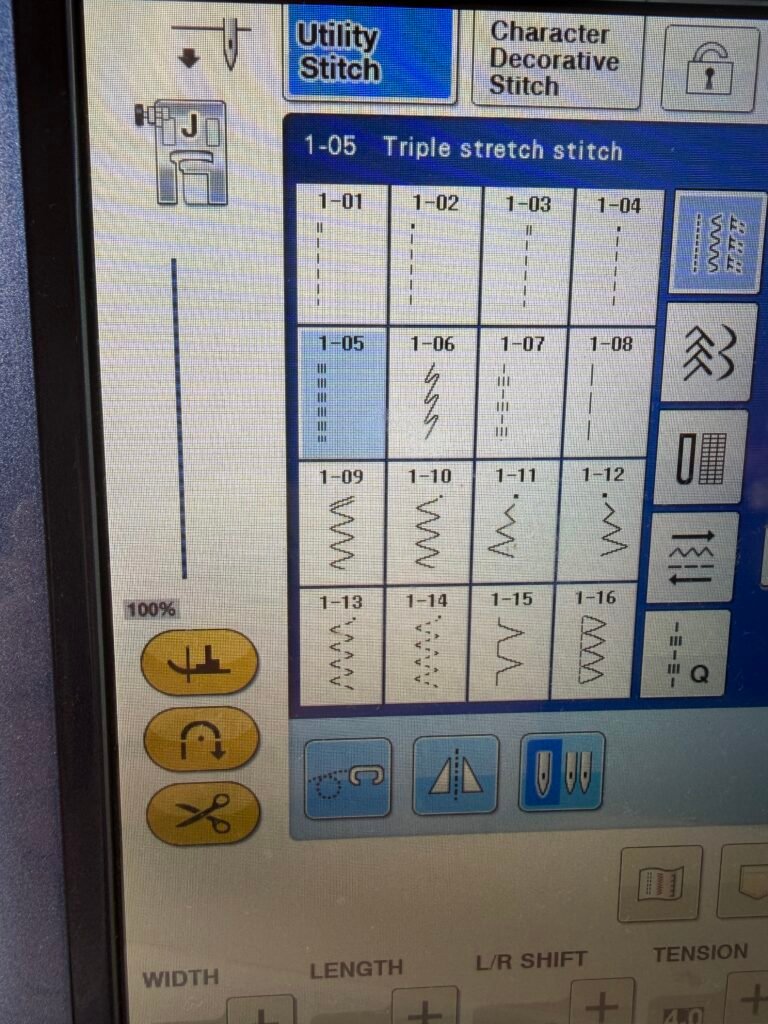
• Narrow zigzag: every machine has one. A width of about 1mm and a length of about 2.5mm is a good place to begin.
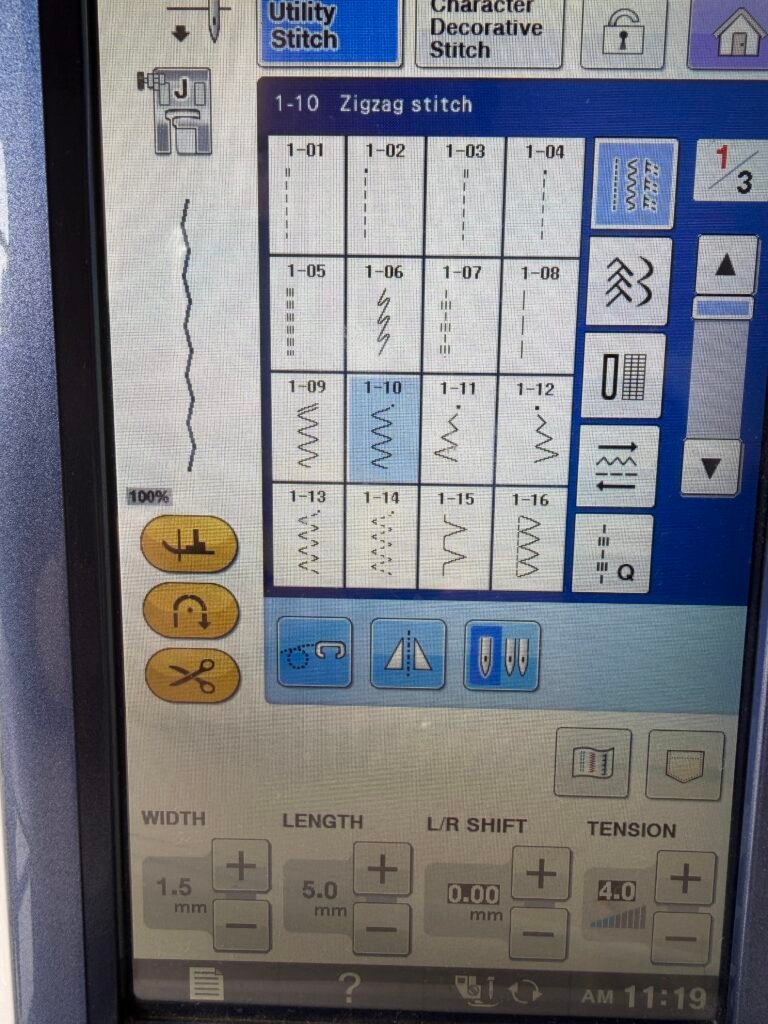
• Straight stitch: fine on seams that are stabilised and don’t need to stretch much, like shoulder seams (more on that below).
Sew a seam on two layers of scrap fabric, then give it a good tug. If the threads pop, lengthen the stitch a touch. If the seam looks wavy, try loosening the needle tension a little.
Every machine is different, so treat those numbers as a starting point. I use a Brother V5LE machine.
Scraps are your best friend here. Testing first is never wasted time.
Stop the fabric stretching as you sew
Let the machine do the pulling. Rest your hands lightly on the fabric to guide it, without tugging or pushing.
A few other things help:
• Lower the presser foot pressure if your machine lets you. Your manual will show you where the dial or setting is. Less pressure means the top layer gets squashed and dragged less.
• Use a walking foot (sometimes called an even feed foot). It grips the top layer too, so both layers travel through together.
• Sew slowly. You’ll have far more control.
• Support the weight of the fabric. Don’t let it dangle off the table, because the drag pulls your seam out of shape.
If you get a mild ripple anyway, a steam press afterwards often relaxes it. Press down gently and lift the iron rather than dragging it, since sliding it stretches the fabric all over again.
Stabilise the seams that need it
Some parts of a garment need to hold their shape, such as shoulder seams, necklines and hems. Without a little help, they stretch out with wear.
These are the helpers I’d reach for:
• Clear elastic (6mm): stitch it into shoulder seams so they can’t grow. It stretches a bit but bounces back.
• Water-soluble double-sided tape (often sold as Wonder Tape): holds layers together without pins and washes away afterwards.
• Knit fusible interfacing or stay tape: a thin strip along a hem or neckline stops it rippling.
Necklines and neckbands need a gentle touch. Use the pattern piece provided as it will be drafted slightly shorter then the neck opening, then ease it on evenly as you sew. Follow your pattern for the exact amount, since it changes from one design to the next.
If this feels like a lot of extras, don’t worry. You can add them one at a time as your confidence grows.
Hemming stretchy fabric
Hems are where wonkiness loves to show up. A line of straight stitching can’t stretch, so the hem puckers or the thread snaps when the fabric moves.
A twin needle is a lovely way round this. It sews two neat parallel lines on the right side, and a zigzag on the wrong side that gives the hem its stretch. Use a stretch twin needle (4mm is a popular size), and check your manual first, since your machine needs a second spool pin to use one. This is very similar to the hems you see on ready to wear garments , they use a coverstitch machine but you’ll get a very similar look with a twin needle.
No twin needle? A narrow zigzag or your machine’s stretch stitch works too. It looks a little less polished, but it holds up well.
Whichever you choose, add a strip of tape or interfacing along the hem fold first. Clip the hem in place rather than pulling it flat, then sew slowly and let the machine feed the fabric.
Give yourself permission to unpick and have another go. Everyone does, and I mean everyone.
What to do when it still goes wonky
Even with all the right kit, stretchy fabric can still misbehave. Here are the usual culprits and what to try.
Wavy seams
The fabric probably stretched as it fed through. Slow down, lower the presser foot pressure, try a walking foot, and finish with a steam press.
Skipped stitches
Start with a fresh stretch needle. If it keeps happening, try a different size or a needle made for very stretchy fabrics.
Puckered or tunnelling seams
The needle tension might be too tight, or the stitches too short. Loosen the tension a little and lengthen the stitch slightly.
Fabric getting pulled into the machine
This often happens at the start of a seam. Hold the thread tails behind the foot for the first few stitches, or begin on a small scrap of fabric and sew straight onto your seam.
Stitches popping when you stretch the seam
The stitch has too little give. Switch to a stretch stitch or zigzag, lengthen it a touch, and use polyester thread.
Almost every one of these gets sorted with a test scrap and a bit of patience.
Best stretchy fabrics for beginners
If you’re just starting out, choose a stable knit rather than a very floppy one. These are the friendliest:
• Cotton jersey (ideally with a little elastane): easy to find and easy to sew.
• Sweatshirt fabric or French terry: thicker, so it’s less likely to ripple.
• Ponte roma: firm and forgiving, with plenty of stretch.
Save the very slippery viscose jerseys and swimwear fabrics for later. They’re lovely, but they’ll test your patience when you’re still finding your feet.
Please see my resources page.
Learning how to sew stretchy fabric takes a few scraps and a little patience, and then it clicks. Be kind to yourself along the way (a little grace goes a long way).
Tell me in the comments what you’re planning to make first. I’d love to know!