Sewing has become popular again, especially among beginners who want to:
- Create custom embroidery projects
- Repair their favorite clothing
- Explore a rewarding creative outlet
This craft offers practical skills and artistic expression, making it an appealing hobby for people from all walks of life.
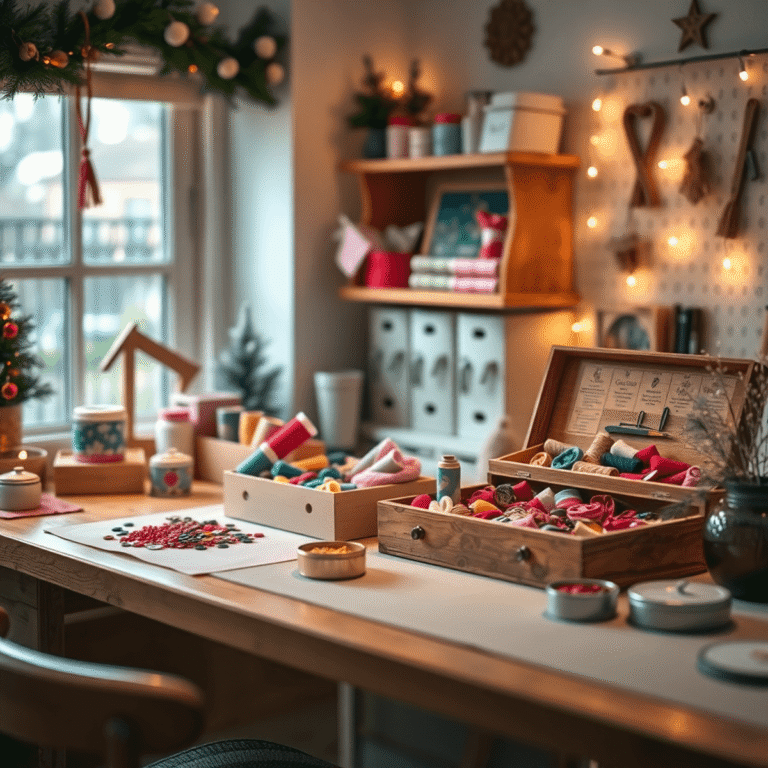
Starting your sewing journey requires more than just enthusiasm, we all have that in the beginning right—you need the right tools for sewing to build your confidence and avoid unnecessary frustration. A well-equipped beginner sewing kit transforms what could be a challenging learning experience into an enjoyable one. When you have proper basic sewing tools at your fingertips, you’ll spend less time struggling with rubbish equipment and more time actually learning the craft.
This article will guide you through the essential parts of a complete sewing kit. I’ll explain not only what you need but also why each tool is important and how to use it effectively. You’ll find out which items should be included in your kit and discover practical tips that will help you succeed from your very first project. Please note this is a guide and isn’t a definitive list, you’ll soon collect more tools then you actually need!
Understanding the Purpose of Each Tool in a Sewing Kit
When you’re starting your sewing journey, you need to understand the purpose of each tool in a sewing kit before making your first stitch. Many beginners rush to buy supplies without knowing what they’re actually for, which leads to unused tools collecting dust in drawers.
Basic sewing tools fall into three main categories based on their function:
- Cutting tools – These help you trim fabric, snip threads, and prepare materials before stitching
- Stitching aids – These protect your fingers and make the actual sewing process smoother
- Correction tools – These fix mistakes and allow you to undo work when needed
Each beginner-friendly sewing kit component serves a specific role in your projects. Your scissors aren’t just for cutting—they determine the accuracy of your fabric edges. Your thimble isn’t optional protection—it prevents painful needle pricks that can make you abandon a project halfway through. I must make a confession I don’t actually own a thimble, as I can’t remember the last time I hand stitched anything. Your seam ripper isn’t a sign of failure—it’s a practical tool that every experienced sewer uses regularly.
Using the right tools dramatically reduces frustration during your learning phase. The difference between having proper tools and making do with whatever’s available isn’t just about convenience—it’s about whether you’ll enjoy sewing enough to continue practicing. At the end of the day although frustration are part of learning we don’t want to to be due to using the incorrect or poor tools.
Essential Tools in a Beginner Sewing Kit
1. Sewing Scissors: Benefits and Usage Tips
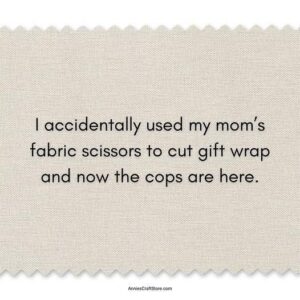
Your choice of scissors makes a significant difference in your sewing experience. Regular household scissors might seem adequate, but they’re designed for paper and general use, which quickly dulls their blades when used on fabric. Dedicated sewing scissors maintain their sharpness longer and provide the precision you need for clean cuts through various textile materials. There is a sewing phrase that spouses that use fabric scissors for thing other then fabric can and will be reprimanded, cops anyone!
Quality sewing scissors reduce hand fatigue during extended cutting sessions. The ergonomic design of proper fabric shears distributes pressure evenly across your hand, allowing you to work through multiple layers of material without developing cramping or discomfort. You’ll notice the difference immediately when cutting through heavier fabrics like denim or canvas—good scissors glide through these materials with minimal effort.
When selecting sewing scissors for your beginner sewing kit, look for these characteristics:
- Blade length between 7-8 inches for general fabric cutting, I like micro serrated blades.
- Stainless steel construction to prevent rust and maintain sharpness
- Bent handle design that keeps fabric flat on your cutting surface
- Comfortable grip that fits your hand size naturally
Maintaining your scissors extends their lifespan considerably. Keep them exclusively for fabric—never use them on paper, plastic, or other materials that dull the blades. Wipe them clean after each use to remove lint and fabric residue. Store them in a protective case or sheath to prevent accidental damage to the blade edges.
For embroidery projects, you’ll want a smaller pair of sharp-pointed scissors (4-5 inches) specifically for snipping thread ends with precision. These smaller scissors give you the control needed for detailed work without accidentally cutting surrounding stitches.
2. Thimble: Protection and Precision While Stitching
When you’re working on hand-stitching projects, a thimble becomes your finger’s best friend. This small protective cap shields your fingertip from painful needle pricks that happen when you push needles through thick fabric layers. I’ve seen beginners abandon hand-sewing projects simply because their fingers couldn’t take the constant jabbing—a thimble prevents this entirely.
The real value of learning how to use thimble properly extends beyond protection. A thimble creates a stable surface that prevents the needle from slipping as you push it through resistant materials. You’ll notice increased control and precision, especially when working with multiple fabric layers or dense materials like denim.
Different types of thimbles cater to various preferences:
- Metal thimbles: Traditional and durable, offering maximum protection
- Leather thimbles: Flexible and comfortable for extended stitching sessions
- Silicone thimbles: Soft, grippy surface ideal for sensitive fingers
- Open-top thimbles: Allow tactile feedback while protecting the fingertip
Choose based on your comfort level and the type of projects you plan to tackle.
3. Needle Threader: Simplifying Threading Needles for Beginners
Getting thread through a needle’s eye is one of the most common frustrations you’ll face when starting to sew. The combination of fine thread and tiny needle eyes can test your patience, especially in low light conditions or when working with darker thread colors that are harder to see.
A needle threader makes this difficult task easy. The most popular design has a diamond-shaped wire loop attached to a flat metal or plastic handle. You insert the wire loop through the needle’s eye, pass your thread through the wire loop, then pull the wire back through the needle—bringing the thread with it.
Different types of needle threaders include:
- Wire loop threaders – The classic diamond-shaped design that works with most needle sizes
- Automatic threaders – Spring-loaded devices that thread needles with a single press
- Coin-style threaders – Flat metal discs with multiple wire loops for different needle sizes
Keep your needle threader in a consistent spot within your beginner sewing kit. This simple habit reduces frustration when threading needles and helps you maintain your creative momentum during projects.
4. Seam Ripper: Fixing Mistakes with Ease
Mistakes happen to everyone learning to sew. You’ll stitch a seam crooked, sew the wrong pieces together, or realize your tension was off. A seam ripper becomes your best friend in these moments, allowing you to correct errors without starting over completely. This small tool with its sharp, curved blade slides under stitches and cuts them cleanly, making it one of the essential tools in a beginner sewing kit.
Using a seam ripper safely:
- Insert the pointed end under the stitch you want to remove
- Gently push the blade through the thread (not the fabric)
- Pull the tool away from you to cut the stitch
- Remove loosened threads with your fingers or tweezers
You can use your seam ripper for more than just removing mistakes. It opens buttonholes precisely, removes basting stitches, and even helps unpick hems when altering garments. Keep the protective cap on when not in use to maintain the blade’s sharpness and prevent accidents in your sewing kit.
Additional Useful Components in a Beginner Sewing Kit
1. Embroidery Tools for Creative Stitching Projects
Embroidery opens up a world of artistic possibilities that go beyond basic repairs and alterations. You can transform plain fabric into personalized pieces with decorative stitching patterns, adding character to everything from clothing to home décor items.
Starting with embroidery stitching requires a few specialized embroidery tools that work alongside your beginner sewing kit components. Small embroidery scissors are essential—these precision tools allow you to snip thread ends close to the fabric without accidentally cutting surrounding stitches or damaging delicate materials. Unlike your larger fabric scissors, embroidery scissors typically feature sharp, pointed tips that reach into tight spaces.
Embroidery needles differ from standard sewing needles in important ways. They come with larger eyes to accommodate multiple strands of embroidery floss, and their sharp points easily pierce through various fabric types. You’ll want to stock several sizes in your kit:
- Size 7-8 needles work well for most beginner embroidery stitching projects
- Size 9-10 needles suit finer, more detailed work
- Larger sizes handle thicker thread and heavier fabrics
Having these embroidery tools in your beginner sewing kit encourages you to experiment with decorative techniques. You can practice basic stitches like backstitch, satin stitch, and French knots on scrap fabric before moving to actual projects. The ability to add personalized touches—monograms on towels, floral designs on pillowcases, or custom patches on jackets—makes your sewing journey more rewarding and expressive. These tools don’t require a significant investment, yet they dramatically expand what you can create with thread and fabric.
2. Mini Sewing Kits: Convenience for On-the-Go Repairs
A mini sewing kit is your portable solution for wardrobe malfunctions when you’re away from home. These small kits can easily fit into purses, glove compartments, or desk drawers, making them ready to tackle loose buttons, split seams, or fallen hems whenever needed.
What’s Inside a Mini Sewing Kit?
The contents of a mini sewing kit differ significantly from a full beginner sewing kit. While your complete beginner sewing kit components include larger embroidery tools, multiple fabric scissors, and various embroidery stitching supplies, a mini version focuses on essentials:
- Pre-threaded needles in basic colors
- Small spools of thread (black, white, navy)
- Safety pins
- Tiny scissors or thread snips
- Spare buttons
How to Get Your Own Mini Sewing Kit
You can assemble your own mini sewing kit by selecting the most frequently needed items from your main supplies, or purchase pre-made travel kits from craft stores. I recommend keeping one in your car and another at work—you’ll appreciate having these tools when a clothing emergency happens during important meetings or events. The key is choosing a durable case that protects sharp items while remaining compact enough for convenient storage.
Tips for Building Your Own Beginner Sewing Kit
Building your own kit gives you control over quality and budget. Start by prioritizing the essentials—scissors, needles, thread, and a seam ripper—before adding specialized items. You can find beginner-friendly sewing kit components at craft stores like Joann Fabrics, Michaels, or online retailers such as Amazon and Etsy.
Budget-Smart Shopping Strategies:
- Purchase basic tools individually rather than pre-packaged kits to avoid unnecessary items
- Look for mid-range brands that balance quality with affordability (avoid the cheapest options that break quickly)
- Check for sales and coupons at local craft stores, which often run 40-50% off promotions
- Consider buying used scissors or vintage tools from thrift stores—older sewing tools were often built to last
Customizing Based on Your Interests:
If you’re drawn to garment making, invest in fabric scissors, measuring tape, pins, and marking tools. Your kit should emphasize cutting and construction accuracy.
For embroidery enthusiasts, prioritize embroidery needles in various sizes, small scissors, embroidery hoops, and a selection of colorful threads. You’ll want tools that support detailed, decorative work.
Start with a basic container—a plastic tackle box or small toolbox works perfectly. Add compartments using small containers or ziplock bags to keep needles, buttons, and thread organized. As your skills develop, you’ll naturally identify which additional tools deserve space in your personalized kit.
Conclusion
Your beginner sewing kit is the foundation of your creative journey. Having these essential sewing tools at your fingertips transforms what could be a frustrating experience into an enjoyable learning process. You’ll find that each tool serves a specific purpose, and together they create a complete system that supports your growth as a sewist.
The beauty of a well-assembled beginner sewing kit lies in its ability to remove obstacles between you and your projects. When you have sharp scissors ready to cut, a thimble protecting your fingers, and a seam ripper standing by for those inevitable mistakes, you can focus on developing your skills rather than struggling with inadequate tools.
Practice with these tools regularly. Each time you thread a needle, cut fabric, or unpick a seam, you’re building muscle memory and confidence. Your hands will learn the weight of quality scissors, the feel of a proper thimble, and the precise control needed with a seam ripper.
Start with these basics, experiment with different techniques, and watch as your sewing skills flourish. The right tools make all the difference.