If you’ve ever looked at a sewing pattern and spotted a long arrow printed across the pattern piece with the word “grainline” next to it, you might have wondered what on earth it’s there for. And if you’ve ever just… ignored it and hoped for the best, you’re not alone.
Grainline is one of those things that sounds more complicated than it is. Once someone explains it properly, it just clicks and after that, you’ll never ignore that arrow again. So let’s have a go at explaining it properly.
[EDITOR: Add a photo here — ideally a pattern piece laid on fabric showing the grainline arrow lined up with the selvedge. Alt text: ‘sewing pattern piece showing grainline arrow on fabric’]
What is a Grainline?
Grainline refers to the direction of the threads that make up a woven fabric. When fabric comes off the loom, it’s made up of threads running in two directions: lengthwise and widthwise. The way those threads run determines how the fabric behaves – how it hangs, how much it stretches, and how it holds its shape.
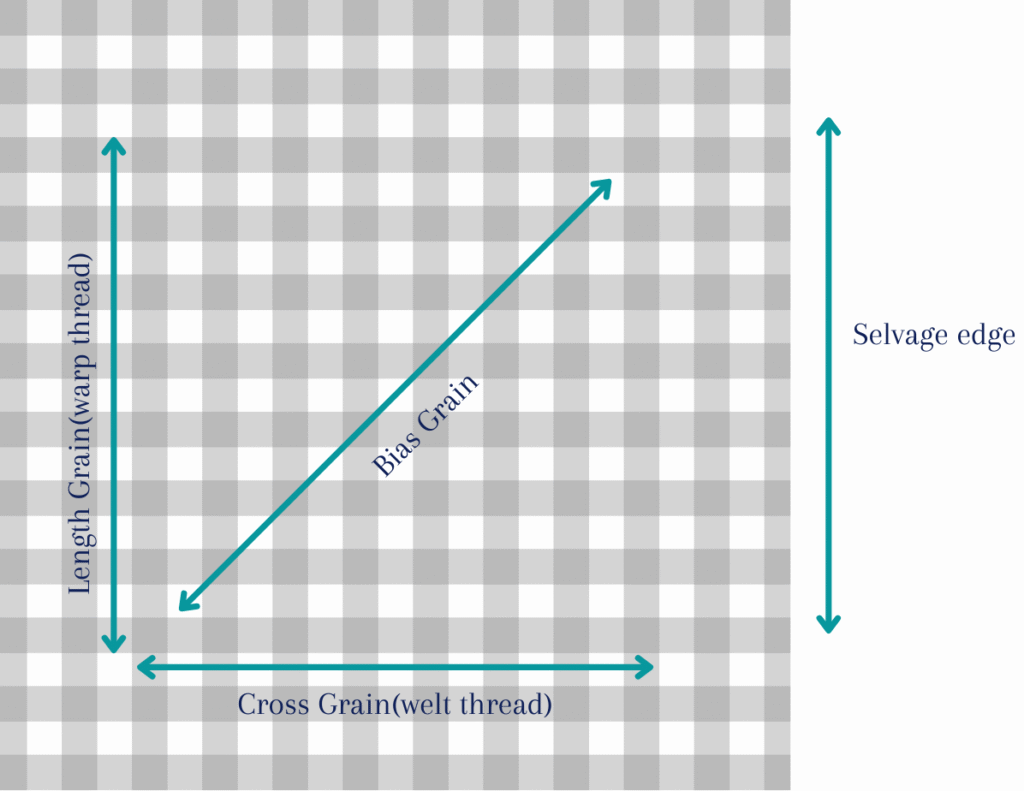
There are three grains to know about:
- Straight grain (lengthwise grain) runs parallel to the selvedge (the finished edges of the fabric). This is the strongest direction with the least stretch.
- Cross grain (widthwise grain) runs at 90 degrees to the selvedge, from selvedge to selvedge. Has a little more give than the straight grain.
- Bias grain runs at 45 degrees to both other grains. This is where fabric has the most stretch and drape.
When a pattern piece has a grainline arrow on it, it is telling you which direction to align that piece with the straight grain of your fabric. Follow it accurately and your finished project will hang correctly, keep its shape, and behave the way the pattern intended.
The Best Way I’ve Found to Explain It
I love a good analogy, and this is the one I find works best. Think of your fabric like a map of an American town, you know the kind, where all the roads are laid out in a neat grid.
The main street running straight through the middle of town? That’s your straight grain. It’s the main road, the most direct route, the one everything else is built around.
The streets going off at right angles to the main street? That’s your cross grain. Running perpendicular, crossing the main road at tidy 90 degree angles.
And those funny roads cutting across at 45 degree angles? That’s your bias grain. Going off in a different direction entirely, with a bit more flexibility and movement to them. Once you’ve got that picture in your head, grainline suddenly makes a lot more sense.
Why Does Grainline Actually Matter?
Grainline matters because fabric doesn’t behave the same in every direction. Cut a piece on the wrong grain and you’ll notice it — the garment might twist to one side, a seam might pull, or a piece that should hang straight just won’t sit right. It can look almost right but feel somehow “off,” and it’s the kind of thing that’s very hard to fix once it’s sewn together.
I’m pretty meticulous about grainline myself — it’s one of those things where being careful at the cutting stage saves a lot of frustration later. The only time I’ve really bent the rules was cutting a neckband for a t-shirt on a slightly different grain because I didn’t quite have enough fabric. With knit fabric you can sometimes get away with it because knits have stretch in both directions, but it’s still not something I’d recommend as a habit!
A Note on Stripes, Plaids and Directional Prints
If you’re working with striped or plaid fabric, grainline becomes even more important, because the pattern needs to match up at the seams as well as hang correctly. Woven stripes and plaids are generally reliable — the pattern follows the grain. But printed stripes and plaids are a different matter entirely, because the print is often not laid down in line with the grain. You can end up in a situation where you’ve followed the grainline perfectly but the stripes don’t line up, which is one of those things that can catch you out if you’re not expecting it.
Always check before you cut — and if in doubt, prioritise the visual pattern matching over the grainline on printed fabrics.
How to Find the Grainline on Your Fabric
The easiest way is to look for the selvedge — the neatly finished edges that run down both long sides of the fabric. The straight grain runs parallel to the selvedge, so if you can find the selvedge, you can find the grain.
But what if the selvedge has been cut off, or you just can’t see it clearly? Here’s a useful trick: most woven fabrics have a tiny bit of give when you pull them selvedge to selvedge (across the width). That slight stretch runs along the cross grain. Turn 90 degrees from that direction, and you’ve found your straight grain.
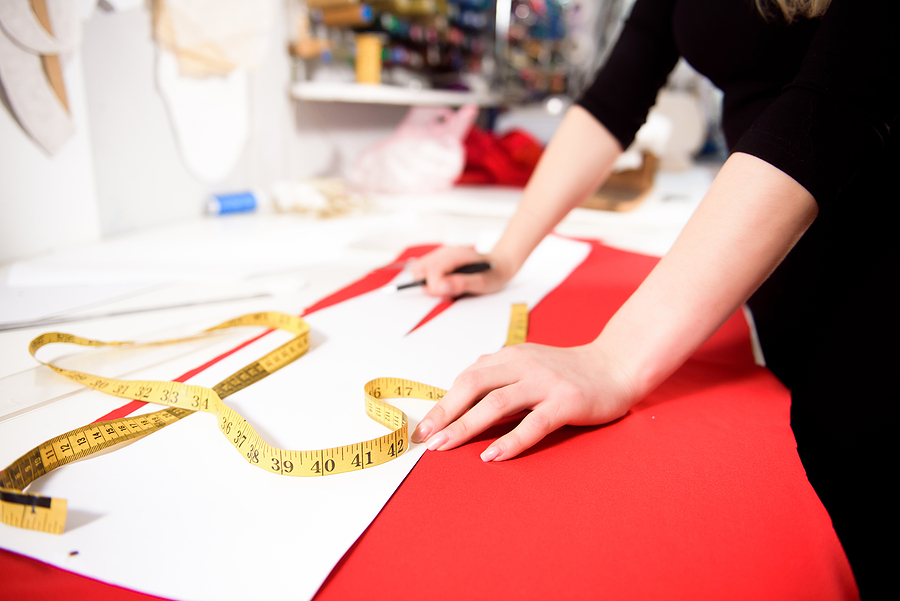
How to Line Up Your Grainline Accurately
Once you’ve found your grain, you need to make sure your pattern pieces are lined up accurately with it. This is where a quilting ruler really earns its place. I prefer using a quilting ruler over a tape measure for this — it gives you a proper edge to line up against, rather than a floppy tape that moves around. Much easier to get an accurate result.
Another trick: once you’ve accurately positioned one piece, you can use it as a reference to line up the next. Place the already-aligned piece alongside and use it as your guide. It speeds things up and keeps everything consistent.
[EDITOR: Add a photo here if available — fabric laid out with a quilting ruler alongside a pattern piece. Alt text: ‘quilting ruler used to align grainline on sewing pattern’]
Common Grainline Mistakes to Avoid
- Not being accurate when lining up
- even a small deviation adds up across multiple pieces. Take your time and measure properly.
- Moving pattern pieces to make the fabric stretch furthe
- if you don’t quite have enough fabric, it’s tempting to rotate or shift a piece to make it fit. But changing the grain to save fabric almost always causes problems later. Better to buy a little more fabric than to compromise the grain.
- Assuming knit fabric is always forgiving
- knits do give you a little more flexibility, but grainline still matters, especially for garments that need to hang correctly.
- Ignoring the grainline arrow on the pattern entirely
- that arrow is there for a reason. Follow it!
Getting Grainlines Right From the Start
Grainline is one of those foundational sewing skills that pays dividends every single time you sit down to cut a project. Get into the habit of checking it carefully right from the start, and it’ll become second nature before you know it.
If you found this helpful, come and join my free Sewing Library, there’s plenty more beginner sewing guidance in there. And if you haven’t already, my posts on seam allowances and sewing machine needles [LINK] are both good reads to go alongside this one.
Any questions? Pop me an email – I’d love to hear from you
Happy sewing!
Louisa x
Grainline refers to the direction of the threads that make up a woven fabric. Pattern pieces have a grainline arrow printed on them to tell you how to align the piece with the straight grain of your fabric — get this right and your finished project will hang correctly and keep its shape.
The straight grain runs parallel to the selvedge and is the strongest direction. The cross grain runs at 90 degrees to the selvedge. The bias grain runs at 45 degrees and has the most stretch and drape
Most woven fabrics have a slight give when pulled selvedge to selvedge — that direction is the cross grain. Turn 90 degrees from there and you’ve found the straight grain
Grainline matters for all fabrics, though knits are a little more forgiving because they stretch in multiple directions. It still affects how a garment hangs, so it’s worth getting right even on stretchy fabric
A garment cut on the wrong grain may twist to one side, pull at the seams, or simply not hang the way it should. It’s very hard to fix once sewn, so it’s worth taking the time to get it right at the cutting stage